Crochet Daisy Granny Square
- Posted on
- By Samantha Mills
- Posted in crochet daisy square, crochet granny square, daisy granny square blanket, learn to make a blanket
- 0
This crocheted daisy granny square is the perfect way to start a blanket for any nursery, or for yourself! Find the free pattern here.
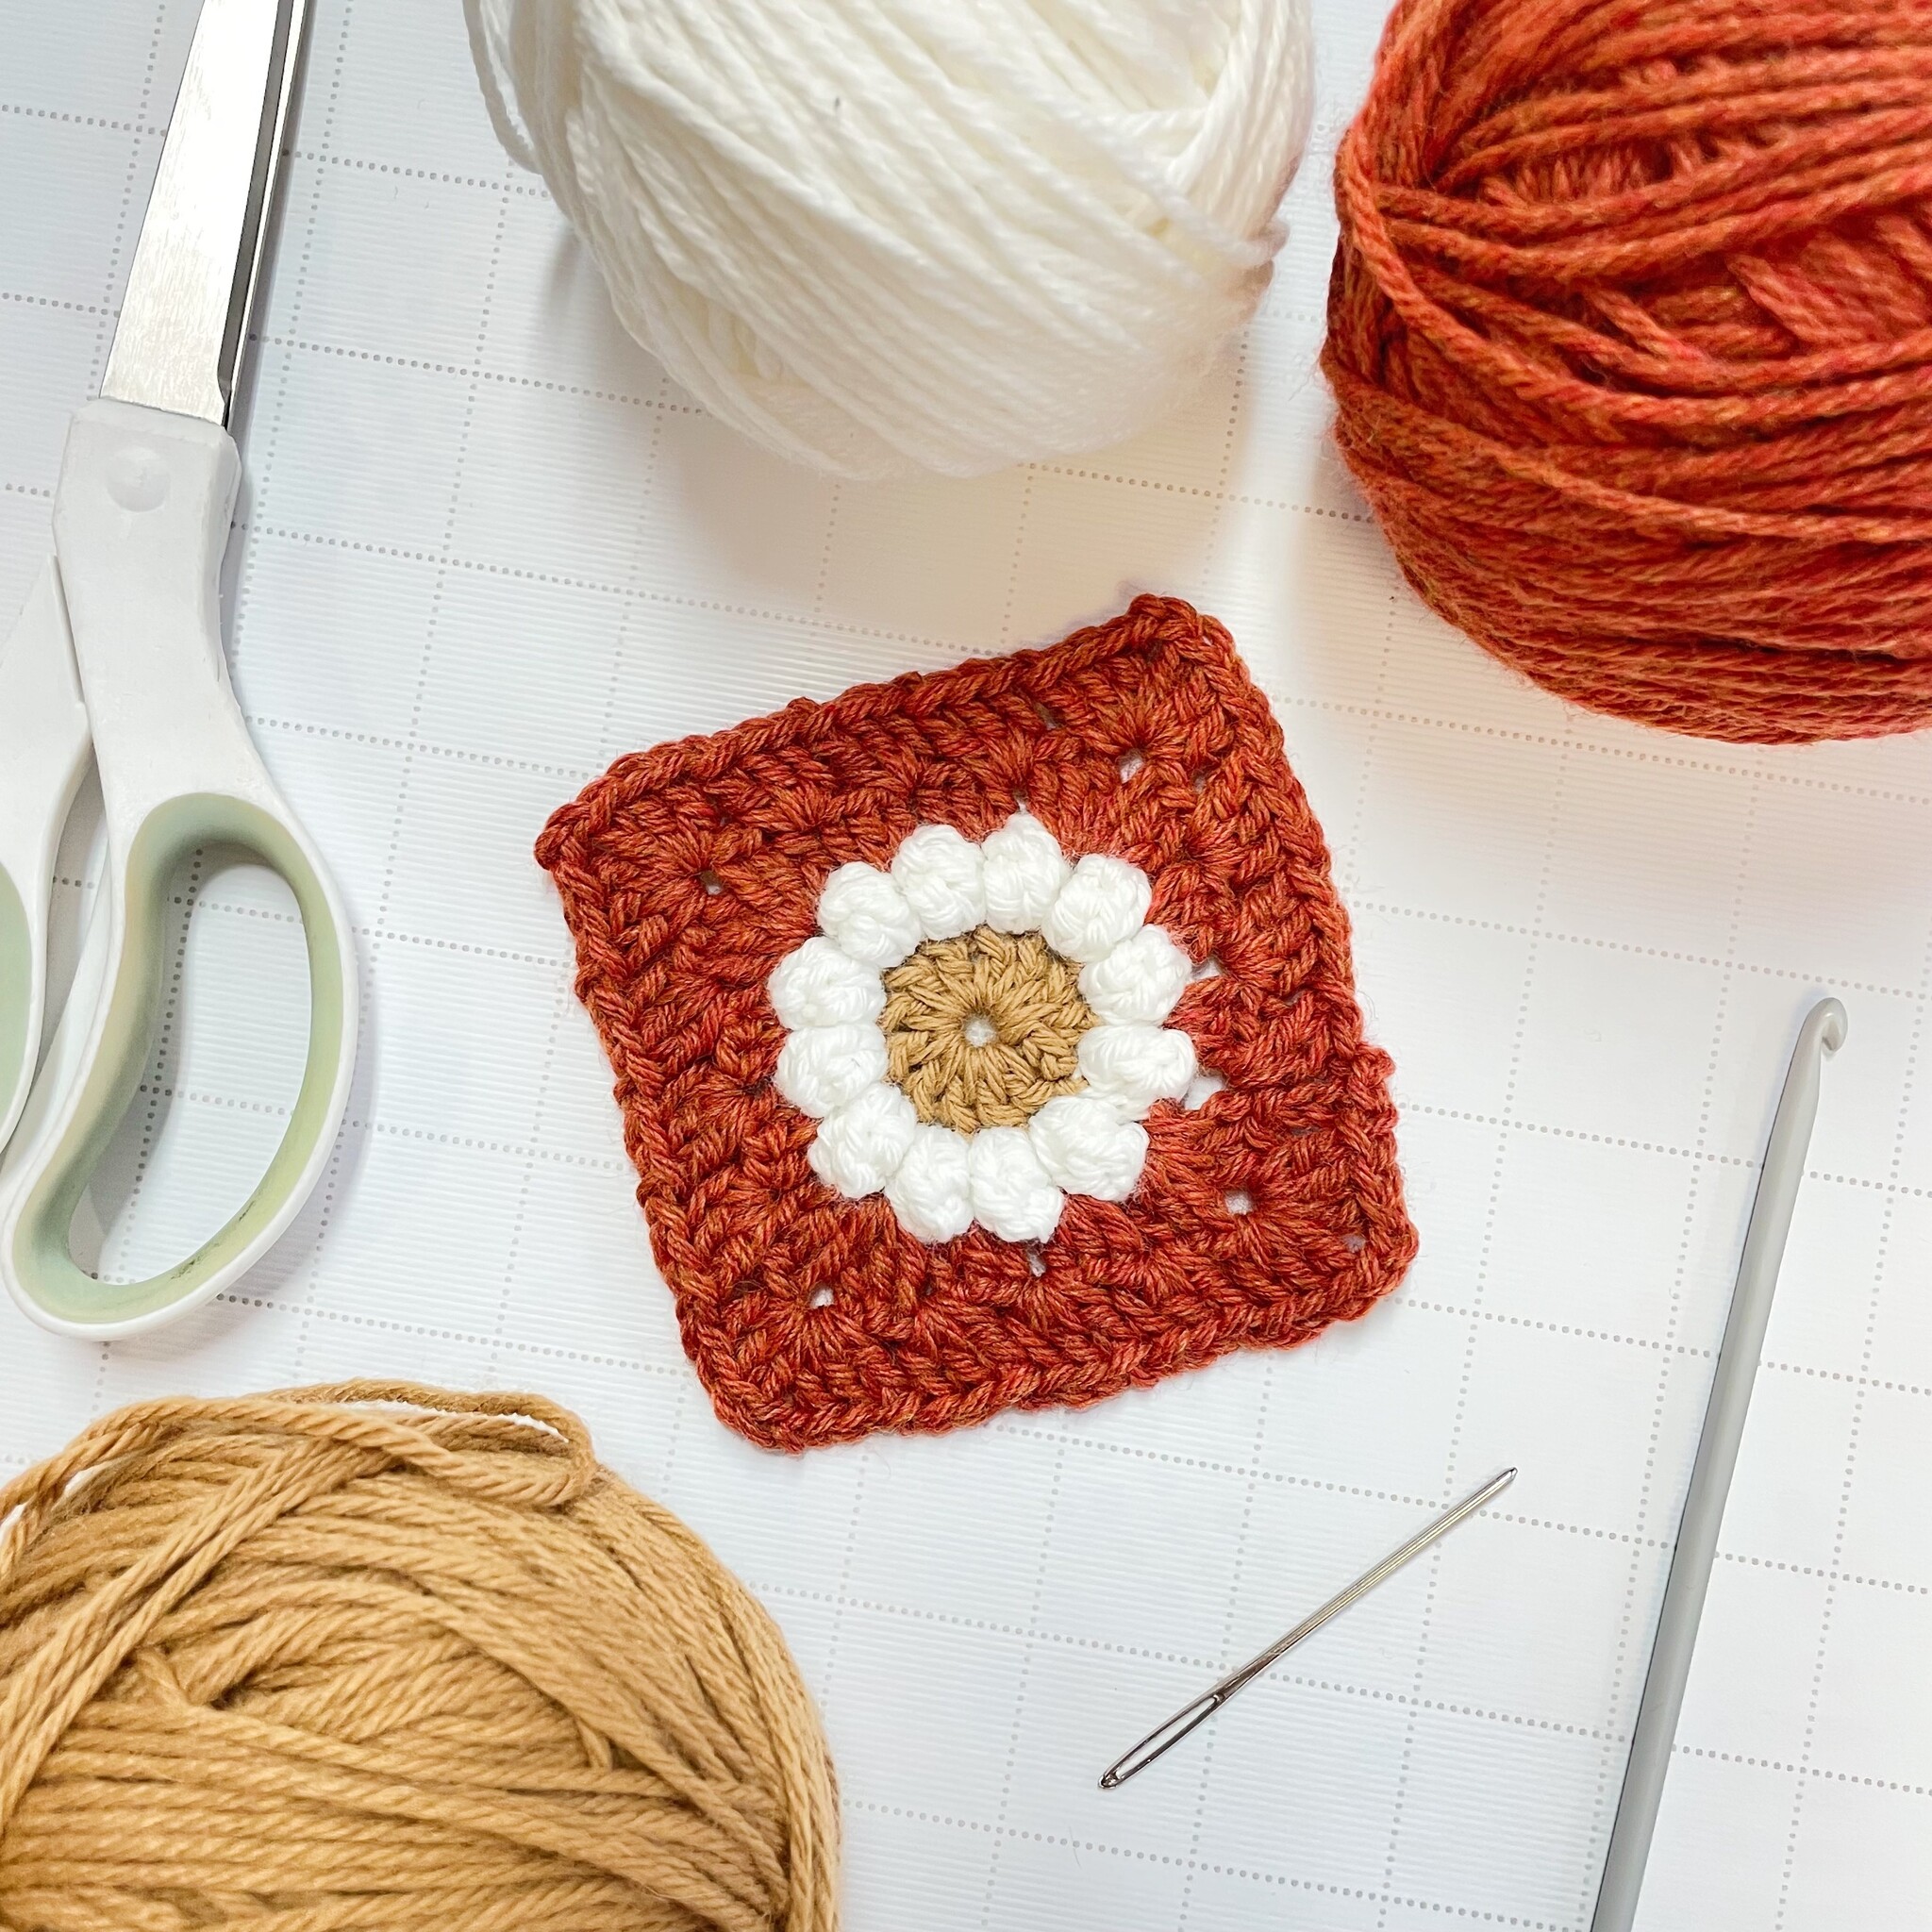
I am currently in love with granny squares, and this blanket is so perfect for a nursery or for yourself! Choose any colour combo! You can even go nuts and have the squares different colours! I personally love Berroco Vintage yarn, an affordable but great quality yarn. It has A LOT of colour options, which really allows your creativity to go wild.
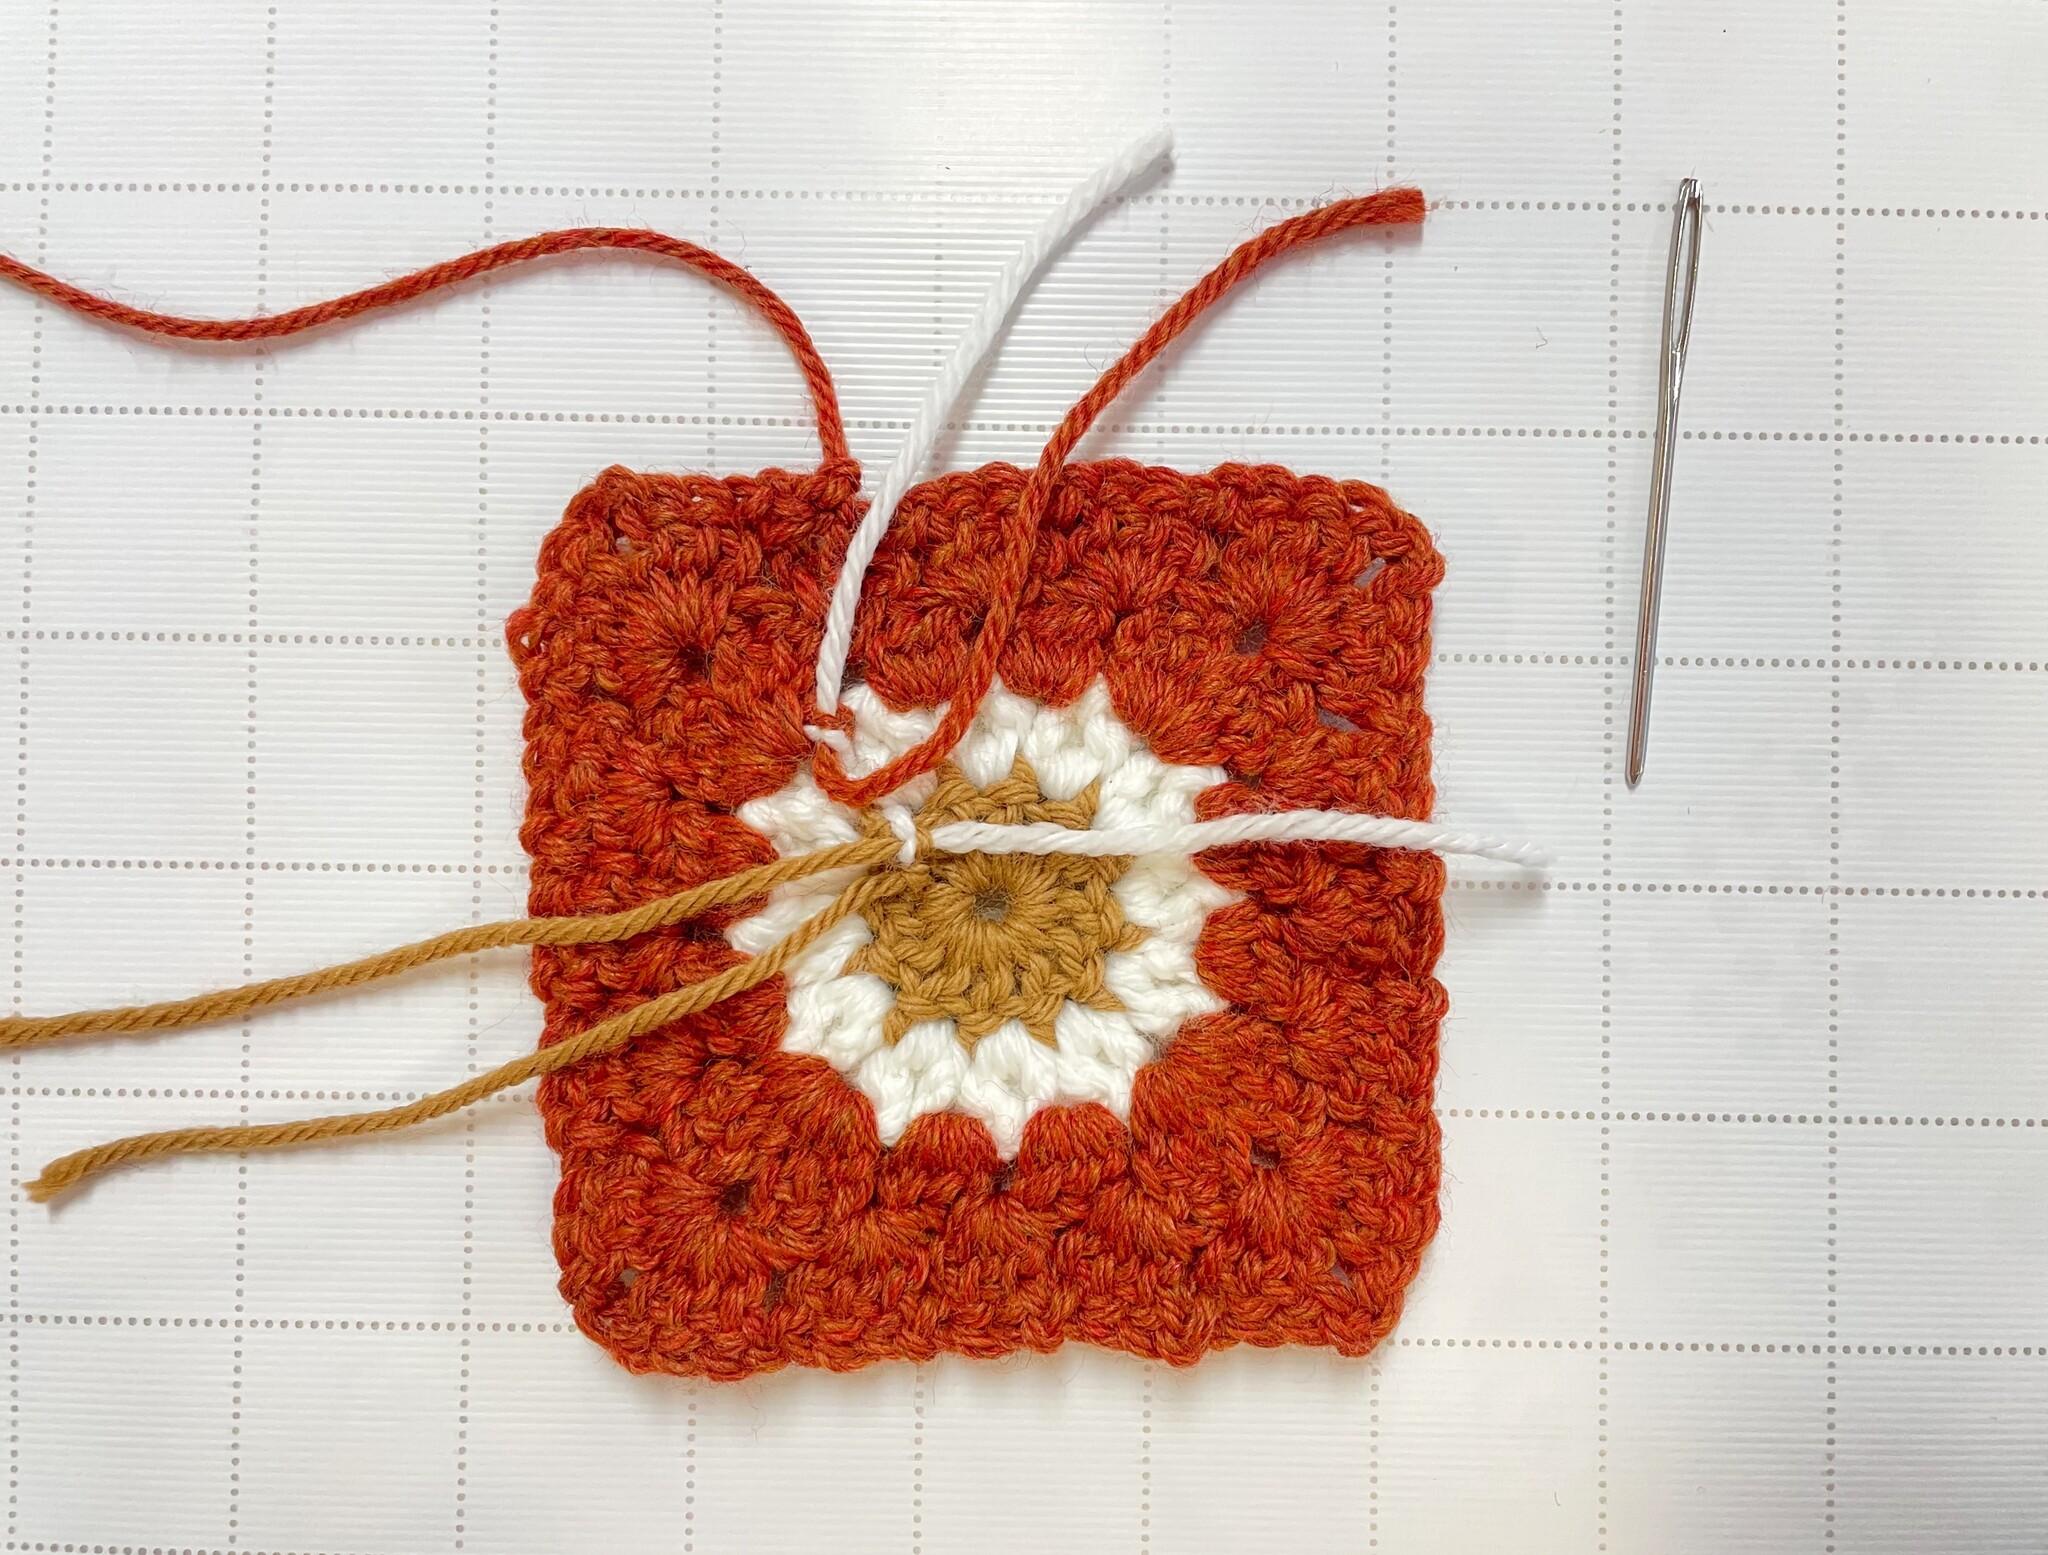
Today, I have a pattern for just the daisy square. You can find many youtube videos to learn how to stitch the squares together.
You will need:
-4.5mm Crochet Hook
-3 skeins of Berroco Vintage Yarn (1 yellow, 1 white, 1 other colour of your choice)
-darning or tapestry needle
Popcorn: DC 4 times in the space, remove your hook from your working yarn, insert your hook into the top of the first DC, grab your working yarn, and pull through.
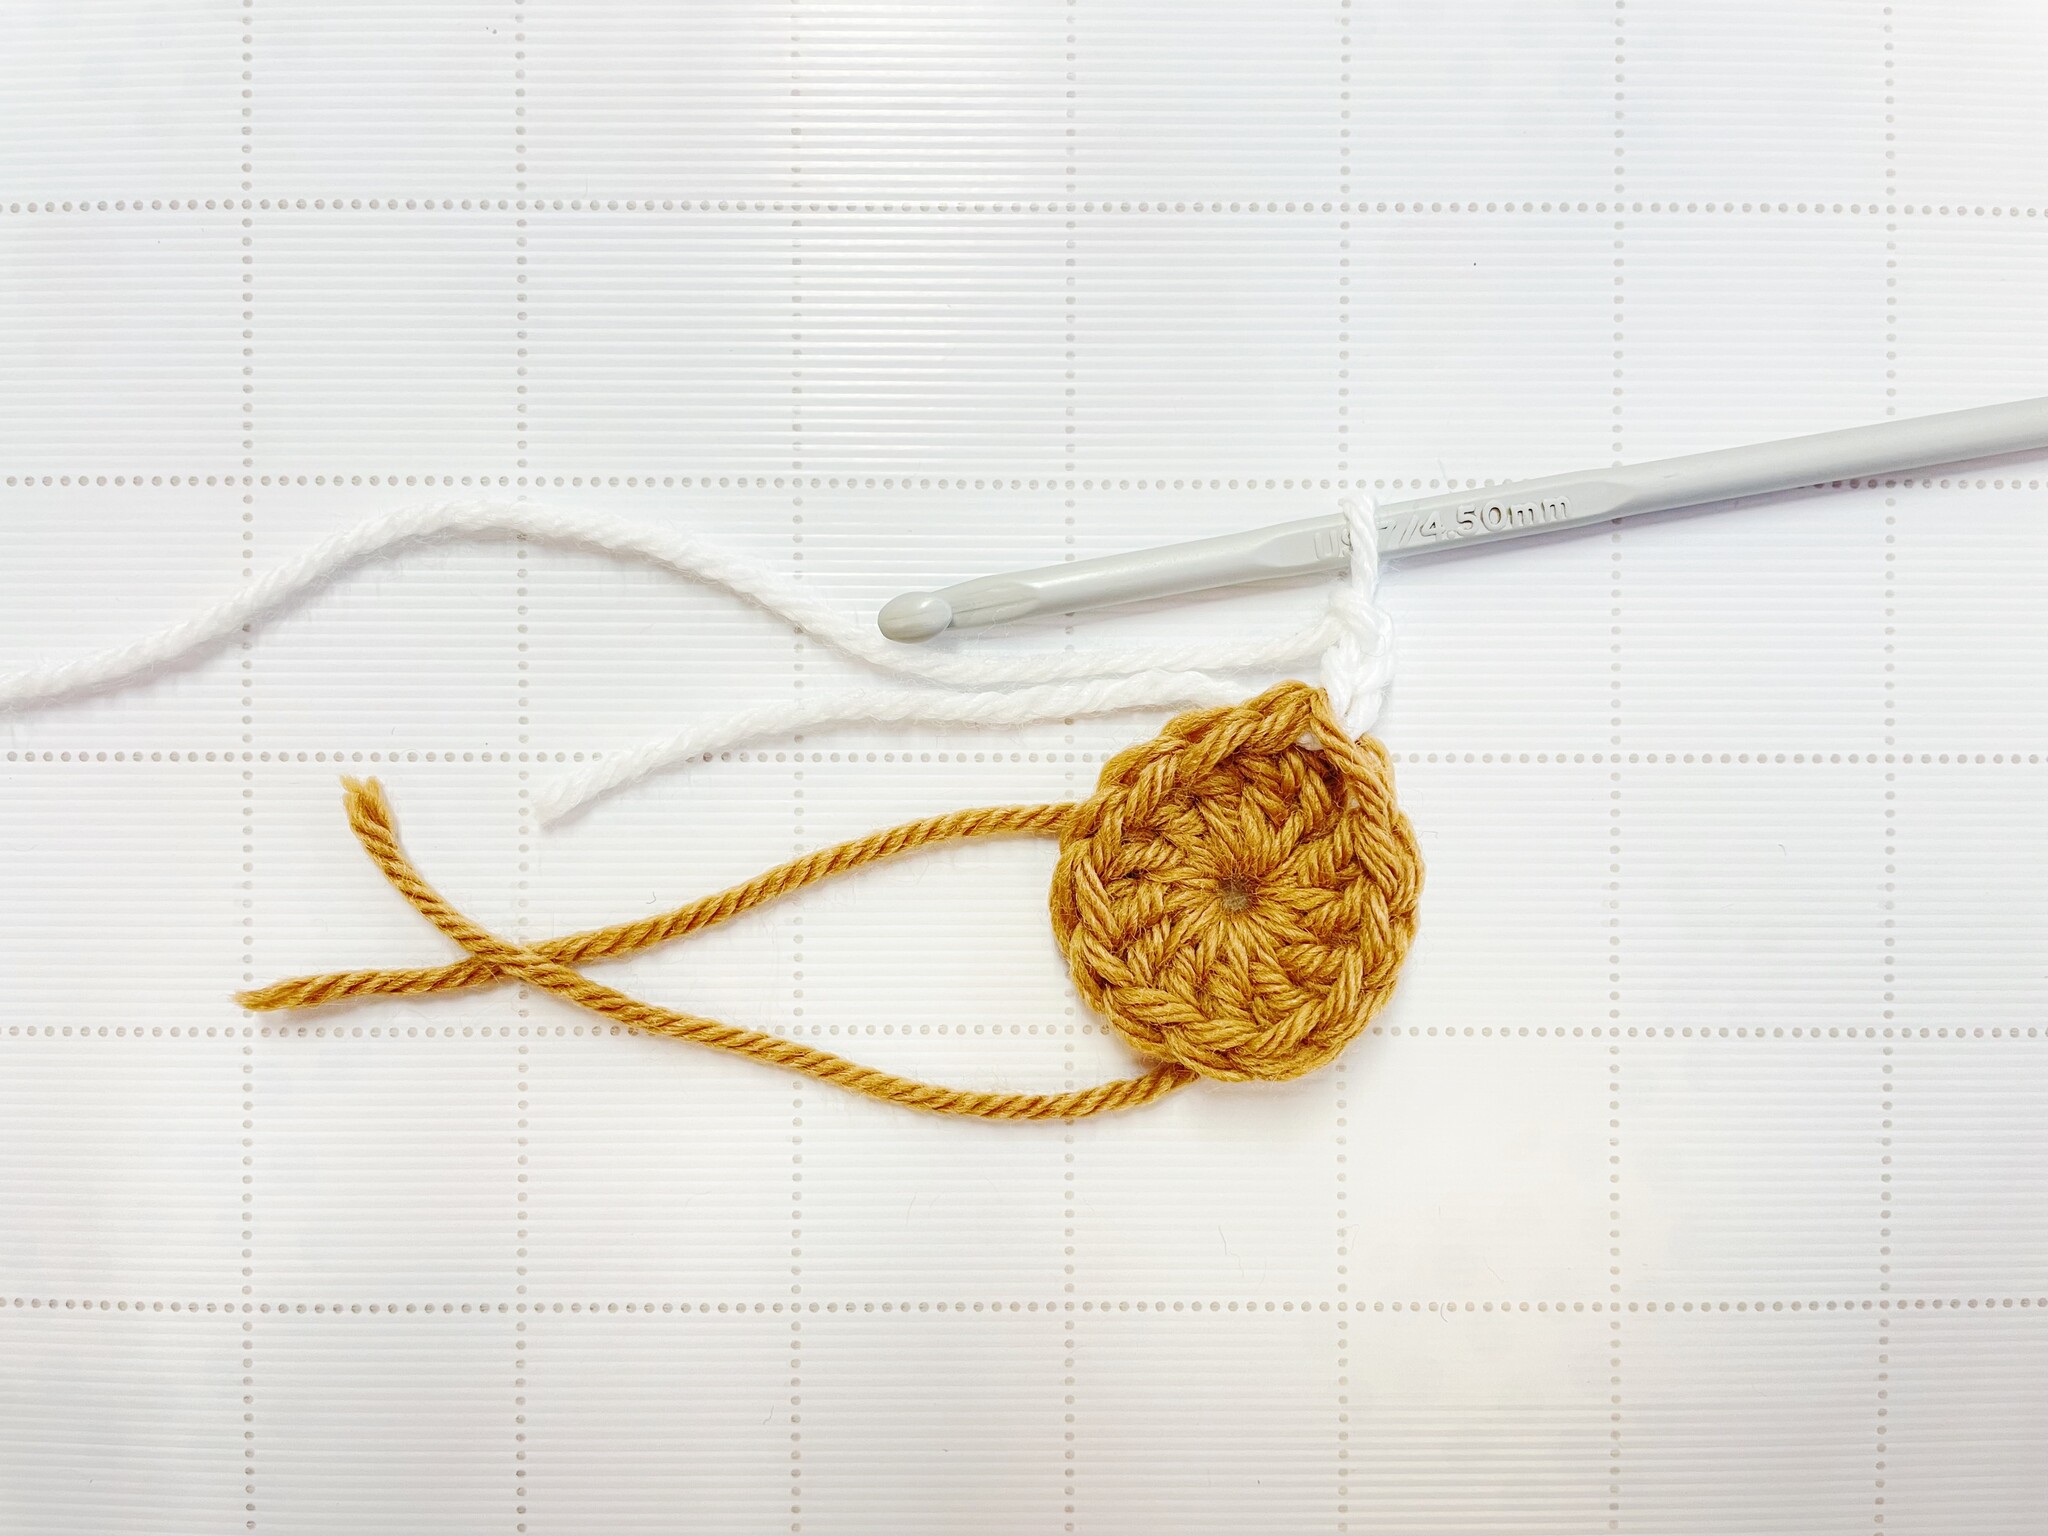
Begin with a magic circle using your yellow colour.
Row 1: CH 3 (does not count as stitch) DC 12 times into the centre of a magic circle. Join into the top of the first DC, change colour to white yarn. CH 3.
The CH 3 made with your white yarn counts as your first DC in your first popcorn petal.
Row 2: Popcorn, CH 1 in each stitch around for a total of 12 Popcorn stitches with chains.
Join into the top of your first Popcorn. Change colour to your choice for the rest of the square.
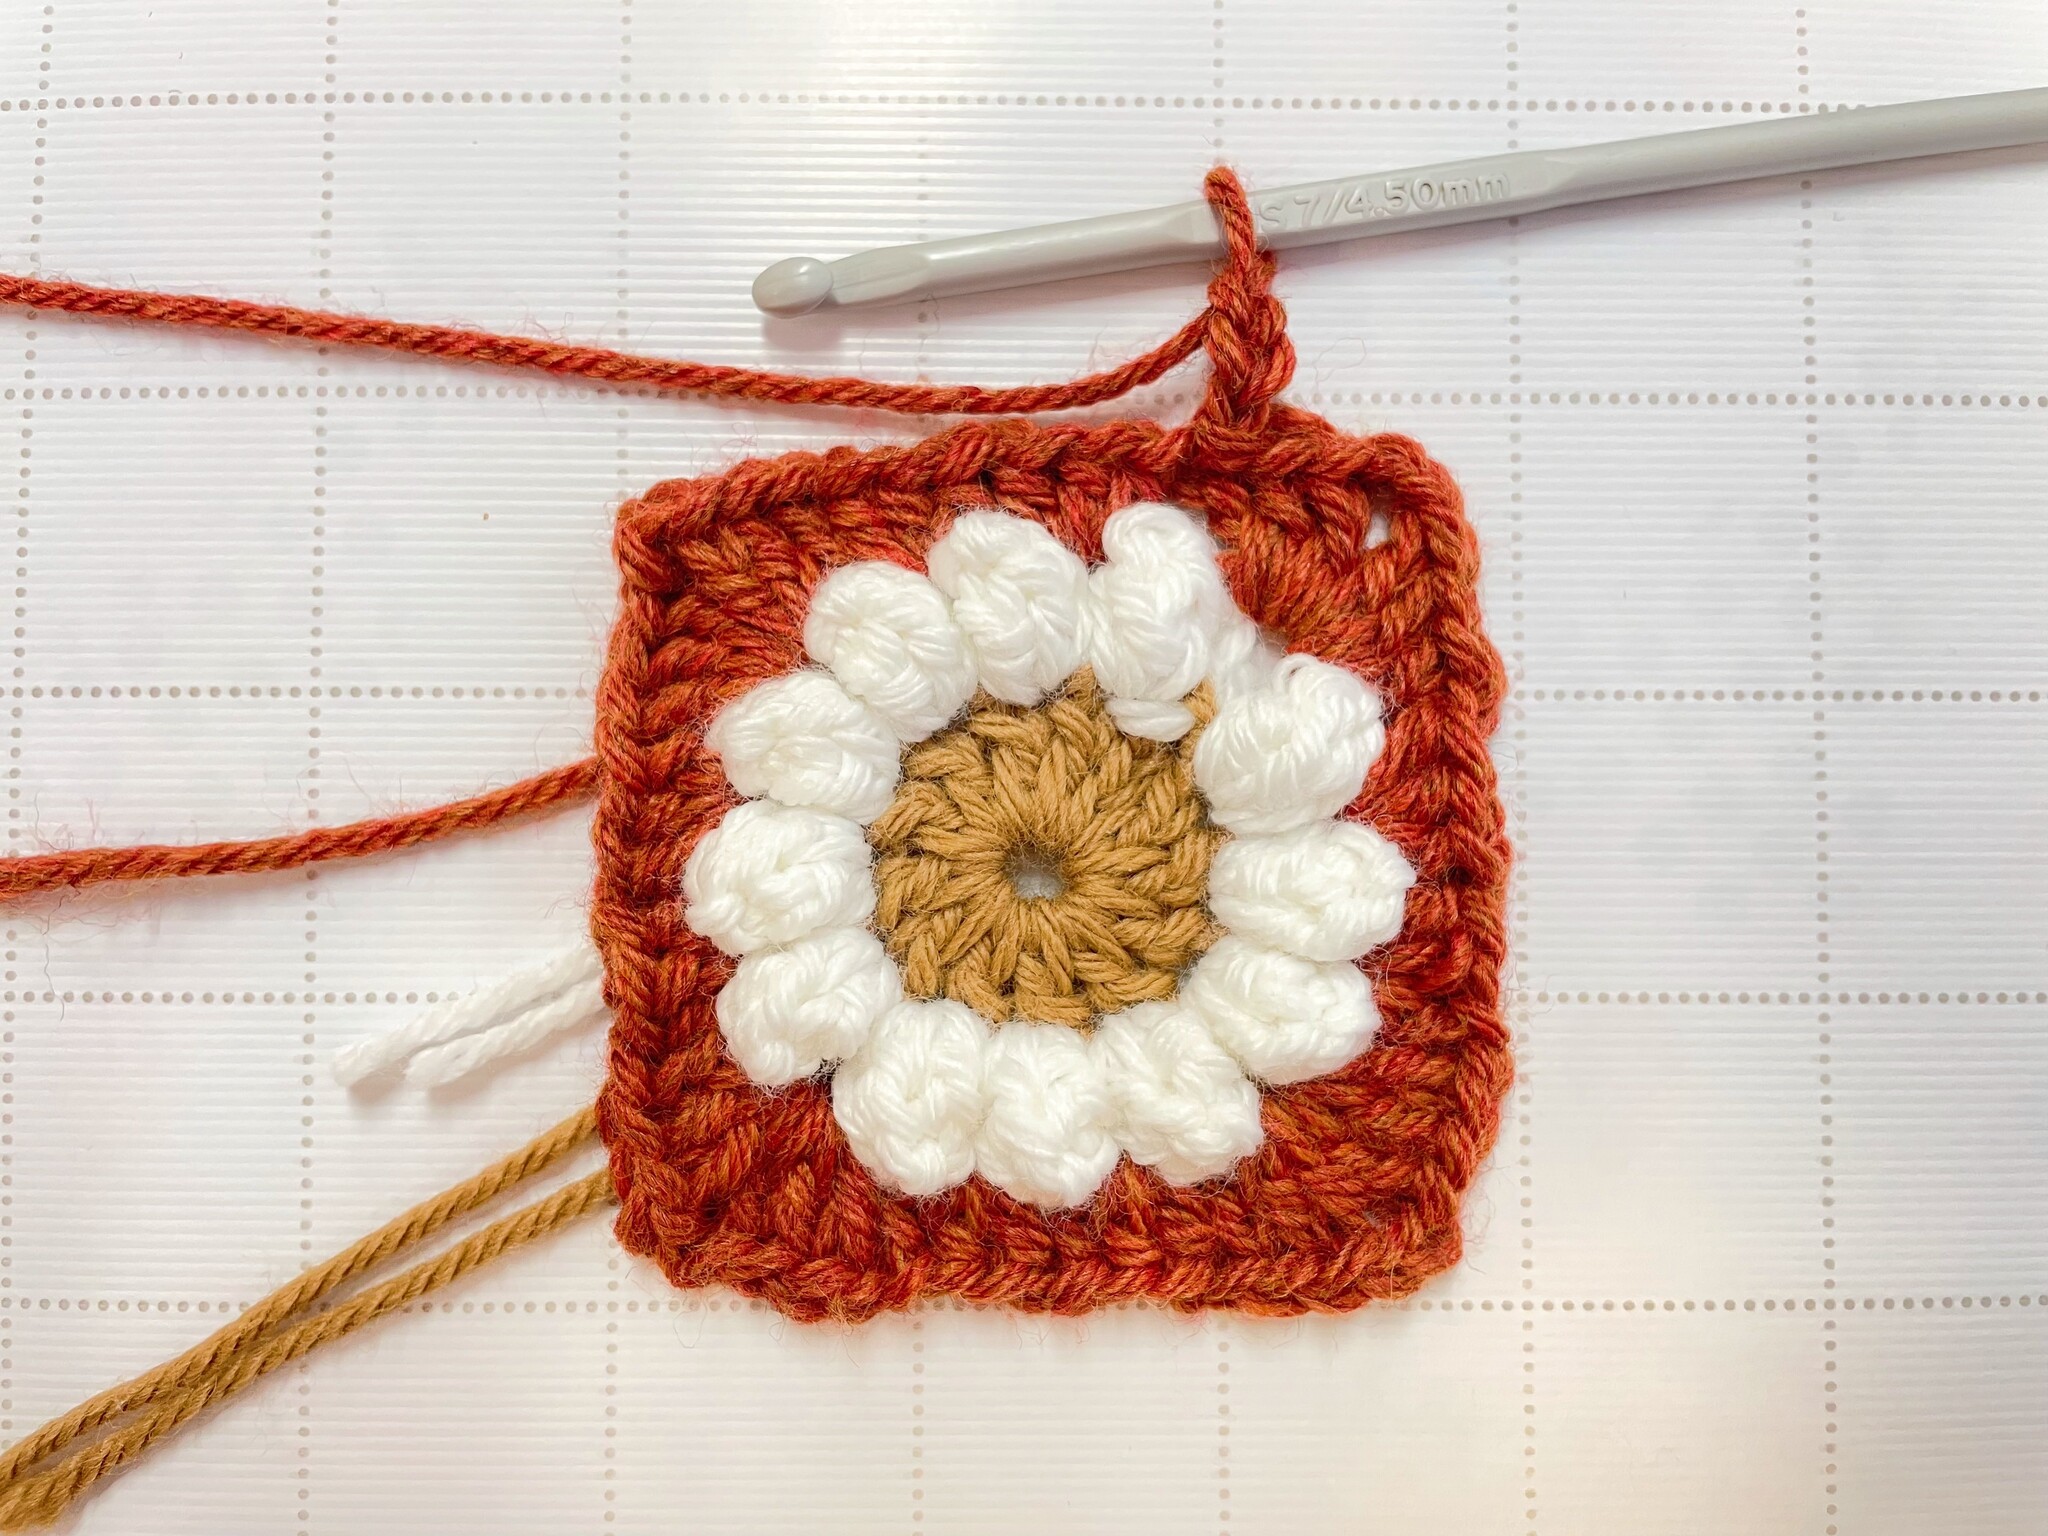
Row 3: CH 3. (this counts as our last DC in the last corner of this square)
*3 HDC in the first chain space after the first Popcorn stitch. CH 1.
3 HDC in the next chain space. CH 1.
Corner: 3 DC, CH 2, 3 DC, CH 1. *
*Repeat around ending in the last corner. Your first CH 3 for this row counts as your last DC in the last corner.
Join into the top of the CH 3 space. CH 3.
The CH 3 you just did counts as your first DC in this row.
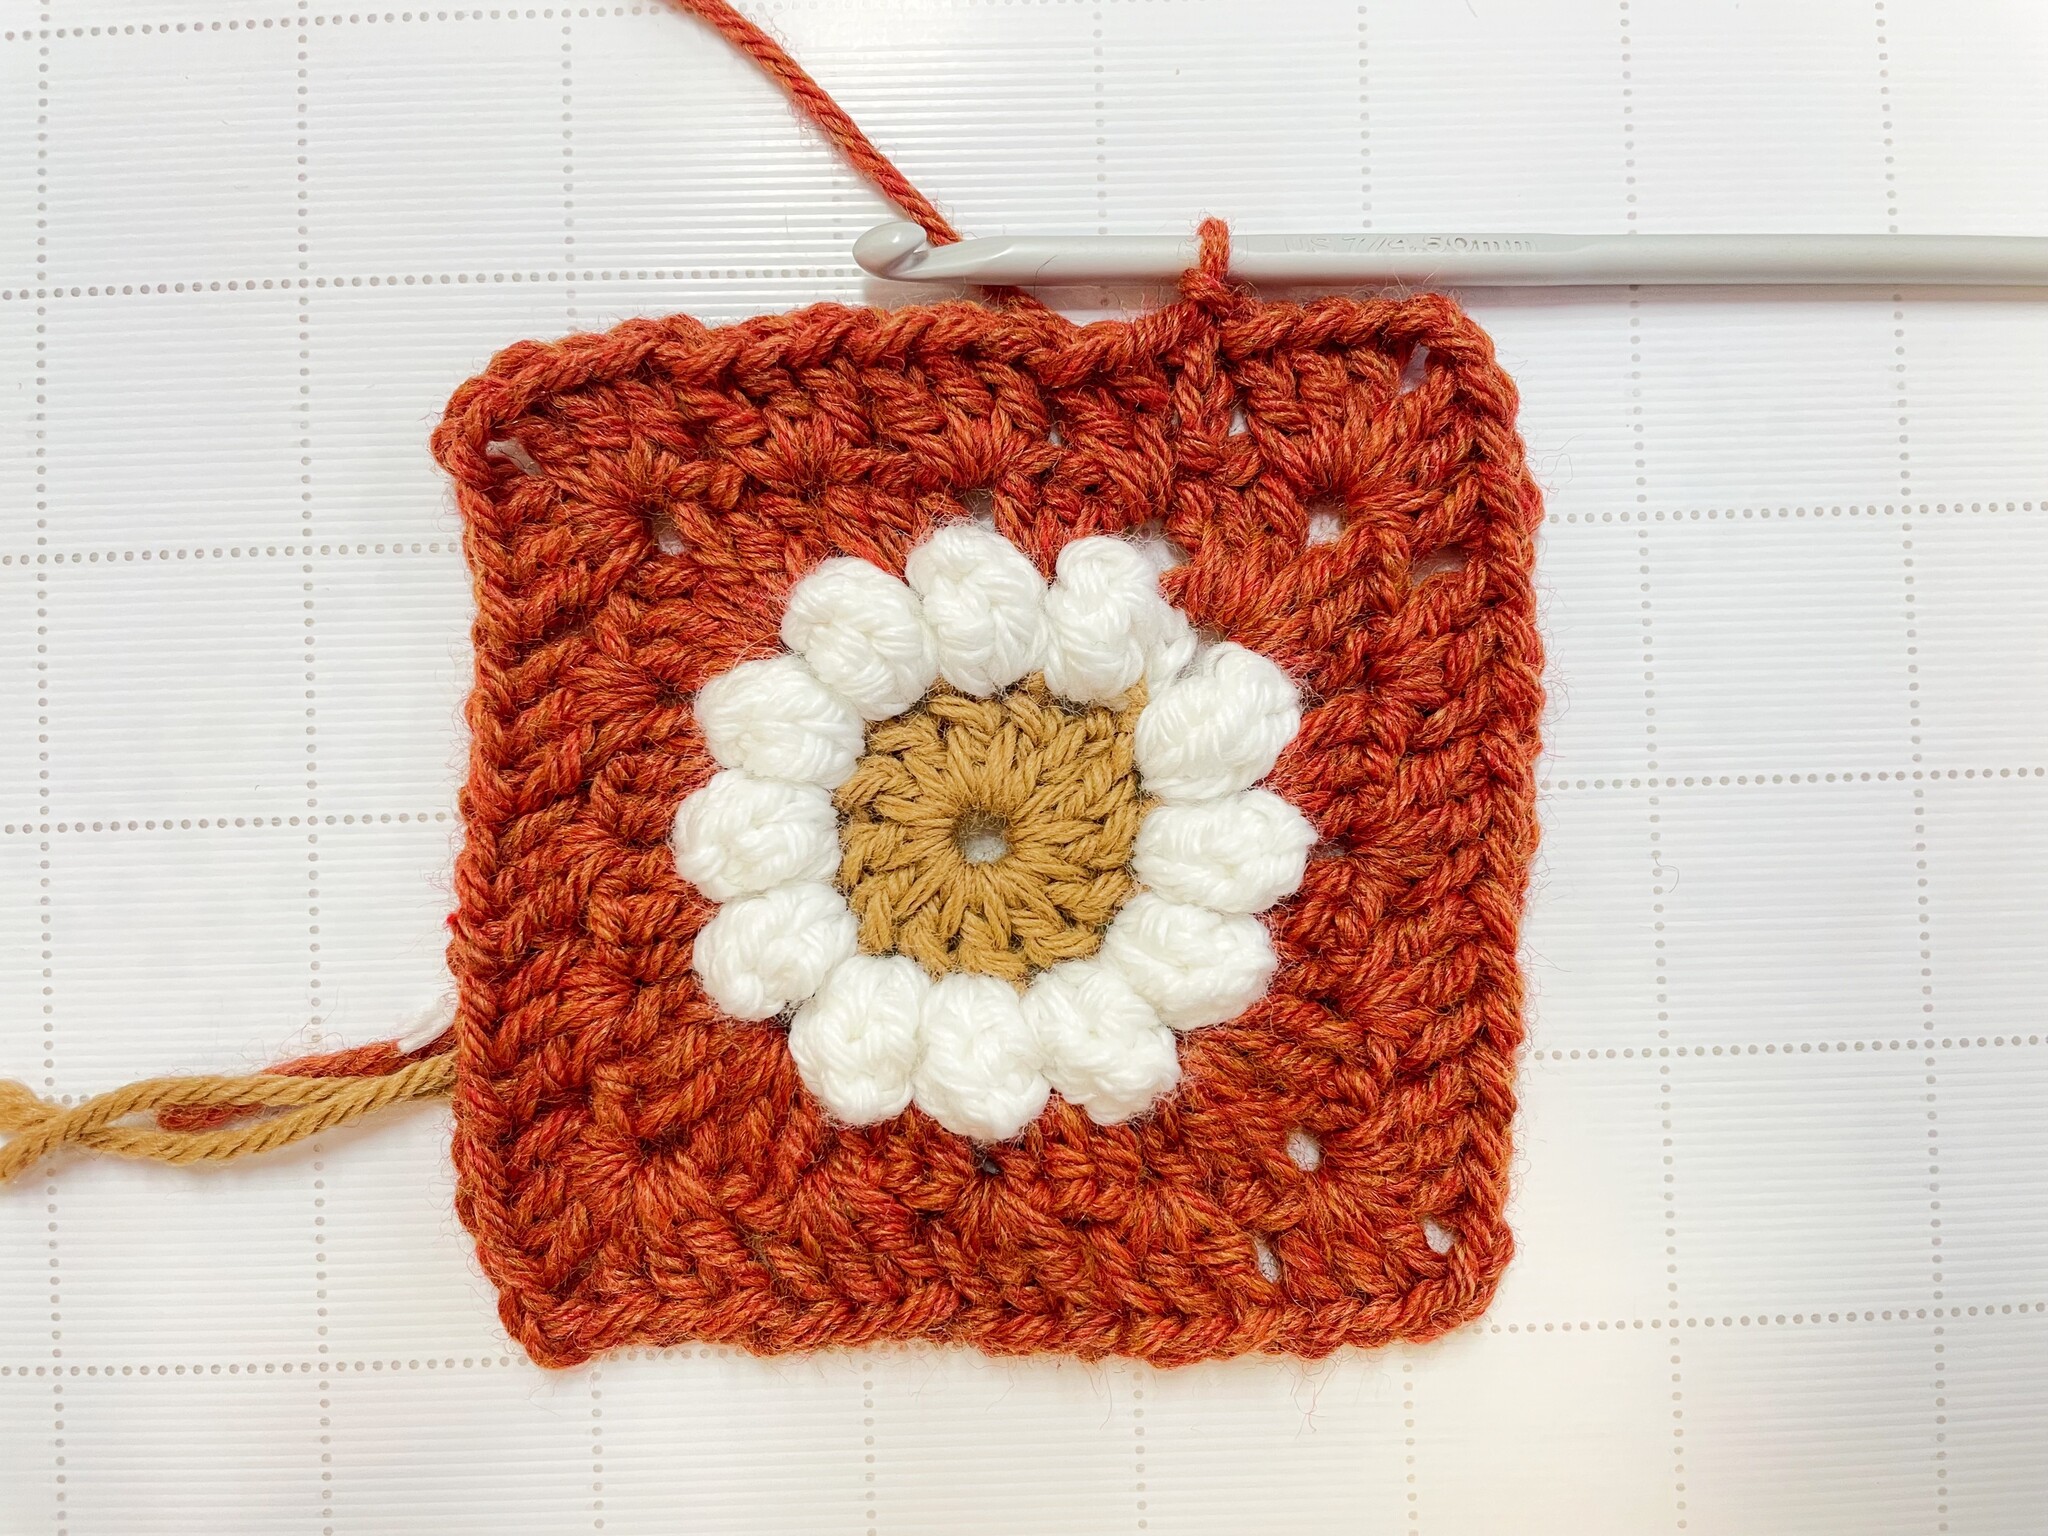
Row 4: Place 2 more DC in the CH space right next to your CH 3.
CH 1.
*3DC in the next chain space, CH 1. * Repeat in the next CH space.
Corner: 3 DC, CH 2, 3 DC, CH 1.
Repeat around putting 3 DC CH 1 in each CH 1 space from Row 3 and 3 DC, CH 2, 3 DC, CH 1 in each corner.

Comments
Be the first to comment...